PDF to JPG: The Ultimate Free Conversion Guide for 2026
Converting PDF documents to JPG images is incredibly useful — whether you want to share a single page on social media, use content in a presentation, or extract visual content from a document. In this guide, we cover everything you need to know about PDF to JPG conversion, completely free.
- When to Convert PDF to JPG
- Quality Settings Explained
- Step-by-Step Conversion Guide
- After Conversion Tips
-
DPI and Resolution: What Numbers Actually Matter
Resolution is the most misunderstood setting in PDF-to-JPG conversion. DPI (dots per inch) controls how sharp the output image looks and how large the file becomes. Here's what to use in practice:
- 72 DPI — Screen-only use (website thumbnails, email previews). Images look fine on screen but will look blurry if printed.
- 150 DPI — A good middle ground. Clear enough to read text comfortably on screen, and acceptable for low-quality prints.
- 300 DPI — The professional printing standard. Use this whenever the JPG will be printed, submitted to a printer, or embedded in a professional document.
- 600 DPI — Only needed for very fine technical drawings, maps, or documents with tiny text. Files become very large.
PDFSnap defaults to 2× render scale, which produces approximately 144 DPI — a smart default that balances quality and file size for most use cases. For print-ready output, switch to 3× or 4× scale.
Multi-Page PDFs: Working With Individual JPGs
When you convert a multi-page PDF, you get one JPG file per page. This is by design — JPG is a single-image format, unlike PDF which natively supports multiple pages. Here's how to handle the resulting batch of images:
- Rename for sorting — Files download as page-1.jpg, page-2.jpg, etc. Keep this naming so they sort correctly in file explorers.
- Combine back into PDF — Use PDFSnap's "Images to PDF" tool to reassemble selected pages into a new PDF after editing.
- Use for presentations — Drag the individual JPGs directly into PowerPoint or Google Slides. Each page becomes a slide image instantly.
- Share on social media — Platforms like LinkedIn support up to 20 images per post. Upload your JPG pages as a carousel to share document content natively.
Privacy: What Happens to Your Files
PDFSnap processes your PDF entirely in your browser using JavaScript — no file is ever uploaded to a server. Your document stays on your device from start to finish. This is especially important for sensitive documents: contracts, medical records, financial statements. You get the conversion without surrendering your data to a third-party server.
When Should You Convert PDF to JPG?
- Social media sharing: Platforms like Instagram and Twitter don't support PDFs — convert to JPG first
- Presentations: Insert PDF pages as images in PowerPoint or Google Slides
- Previews: Create thumbnail previews of PDF documents
- Editing: Edit PDF content in image editing apps
- Uploading to forms: Many online forms only accept image files
- Quick sharing: JPG files are universally supported on all devices
Understanding Quality Settings
- High quality (90-100%): Best for printing, archiving, and professional presentations. Large file size.
- Medium quality (75-85%): Perfect for digital sharing, websites and presentations. Recommended.
- Lower quality (50-70%): Good for quick previews and thumbnails. Smallest file size.
Step-by-Step PDF to JPG Conversion
Open PDF to JPG Tool
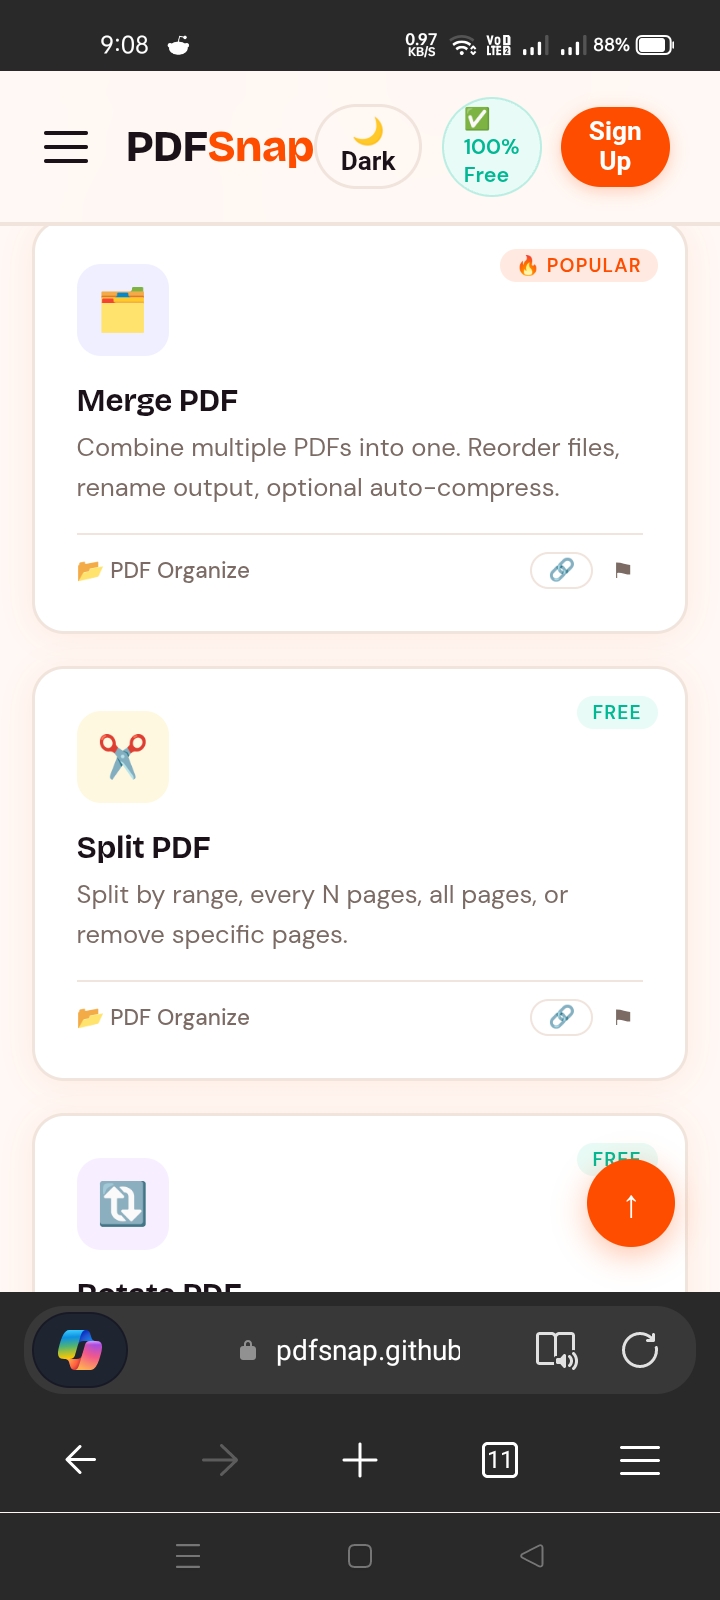
Click the "PDF to JPG" card on the homepage — marked with 🔥 Popular badge.
Upload Your PDF and Set Options
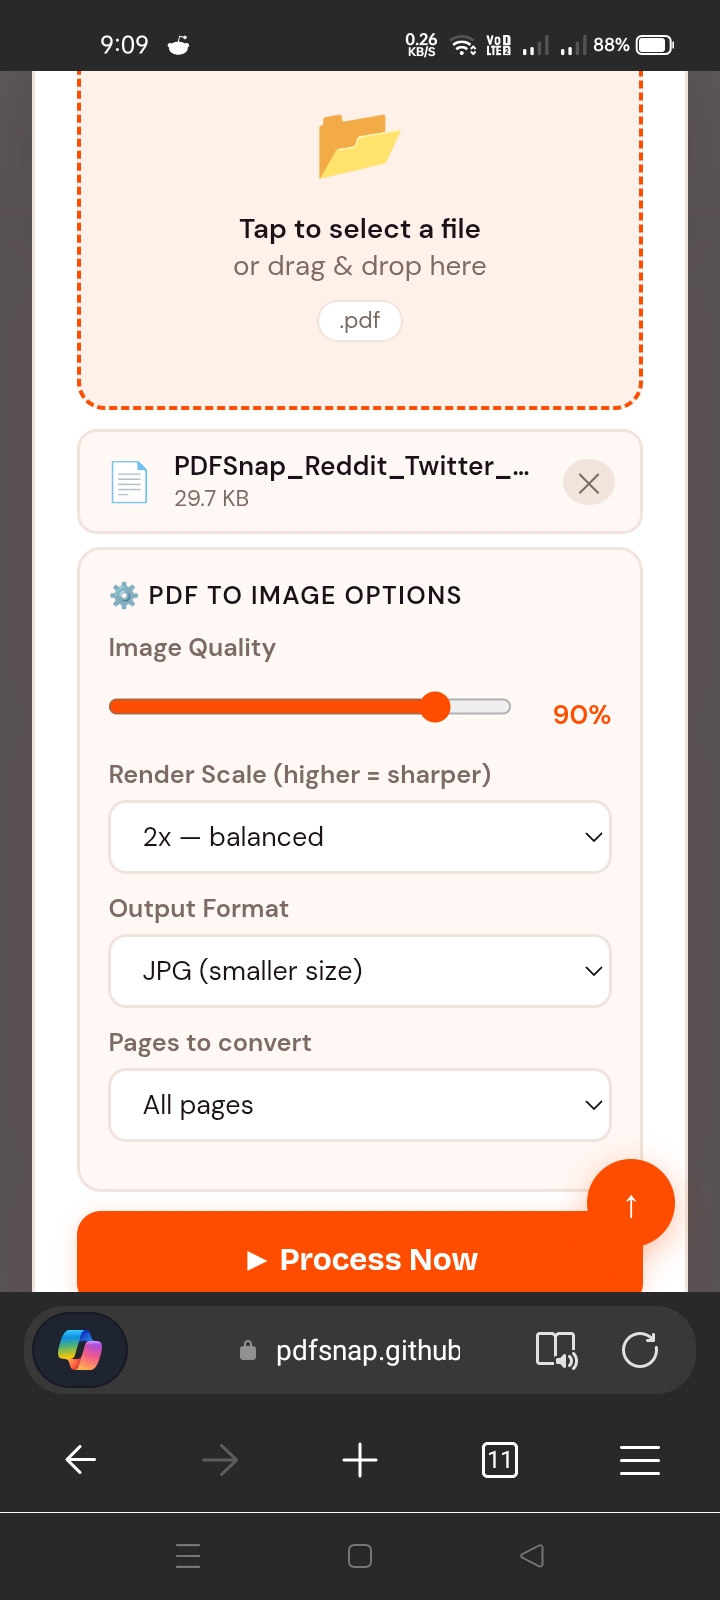
Select your PDF file from your device. Any PDF works — scanned documents, formatted reports, everything. Then set your Image Quality (90% recommended), Render Scale (2x for sharp output), Output Format (JPG or PNG), and which pages to convert.
Process and Download
Click "Process Now". Each page becomes a separate JPG file. Download them individually — you'll see one download button per page, labelled page-1.jpg, page-2.jpg, and so on.
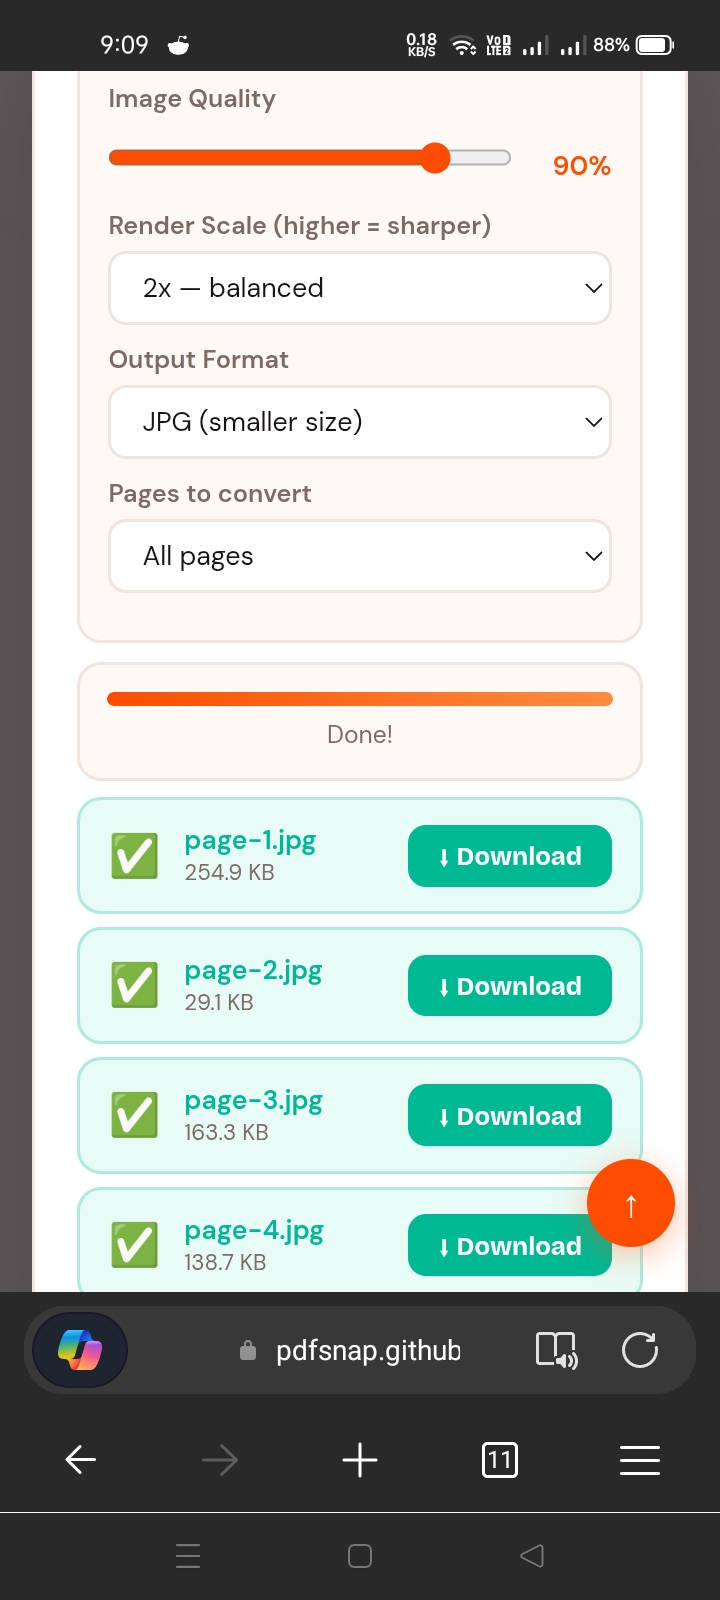
Our tool processes each page of your PDF separately, giving you individual JPG files for each page. This makes it easy to use just the pages you need!
What to Do After Converting
- Use our Compress Image tool to reduce the JPG file size if needed
- Use our Resize Image tool to scale images to exact dimensions
- Combine images back into a PDF using our Images to PDF tool
Frequently Asked Questions
Try Our Free Tools Now! 🚀
40+ free PDF and image tools — no signup, no watermark, no limits!
🚀 Go to Free Tools →